Archive for the ‘Retouching’ Category

Photoshoot for a fashion catalogue

Thursday, January 15th, 2015

Behind the Scenes – photographing the Spring / Summer 2015 Hell Bunny Catalogue

Shooting a fashion collection for a catalogue sounds glamorous and a lot of fun. I’d be lying if I said it was not fun…but it involves plenty of hard work too. Here’s a little slideshow to show you some of what goes on behind the scenes.

Behind the Scenes – creating the Hell Bunny catalogue from Terry Mendoza on Vimeo.

Read on to learn more about the entire process i.e what was involved in the photography for the latest catalogue.

Moodboards…

Six months ahead the Hell Bunny design team plan ‘poster’ themes- the editorial images which appear on catalogue covers. These are often shot on location. The team researches online and creates moodboards so everyone appreciates the feel they are looking for. This also ties in ideas for props, hair styling and makeup.

Four months out they start the model selection – generally selecting one or more new models to keep the catalogue looking fresh.  I browse my model database of those I’ve worked with and forward suggestions, often putting out a casting call too, shortlisting promising candidates for the company audition.

Once the poster themes have been chosen I start sourcing props – the studio already has a wide selection of retro props, but invariably I’ll scour boot sales, maybe cadging props from friends and family too.  For this particular shoot I hired a couple of candelabras from a secondhand shop.

Next the logistics of ensuring the plan comes together – props/models/makeup artists and hair stylists will all be available on the required dates.

Checklists of props and equipment are prepared. Working away from base it is vital that nothing gets forgotten.   I plan on the assumption that if anything can go wrong it probably will!  So spares of everything  are carried – camera, tethering lead, laptop, lighting units, stands, hard drive, battery charger and so on.

The Hell Bunny outdoor poster shots were taken on a bright September day in South East Essex – some at Westcliff Cliffs, some by Southend Pier and the rest around beach huts in Thorpe Bay. A further rainy December day was spent shooting the  interior ‘church’ shots in a Grade II listed building in the Essex countryside – complete with its own private chapel.

It took five further days to shoot the catalogue shots in the studio.  Shoot days are not for the faint-hearted…some of the team rising at 4am to get to the studio for 8:30. It takes between 90 minutes to two hours for hair and makeup, so with multiple models, both Natasha and Bella have a busy start to their day! It is common for shoots to finish around 6:30 in the evening too.  Once back home around 8:30pm, and the first task is to create an insurance backup of images – never trust a single hard drive! 4500 shots were taken over the week, with the Nikon camera tethered to Lightroom.  With that many images, a very organized workflow is vital.  As each outfit is photographed it drops into its own named file directory, with the designers simultaneously making their image selections.   By the end of the week 850 images have been selected, so the work on ‘cleaning up’ images can start.

Preparing images in Lightroom and Photoshop

– the technical bit!

I use a colour-calibrated monitor at the studio to check images.   Images are shot  in RAW format, and the first Lightroom step is to apply the presets I’ve created, one for each of the three lenses I use. Next I refine Colour Balance, White point & Black Point for each image. Special attention is given to dark fabrics – detail must remain clear whilst not affecting the other tones in the image.   All the images are now exported as Photoshop files using Lightroom.

I now run a batch process I’ve created, which prepares files for individual attention – adding correction layers to each file before saving /closing the file.

Files are now individually opened and checked full size, so flaws can be cloned out or otherwise corrected.  When the entire batch has been cleaned in this way they are all double-checked in Lightroom before being cropped as necessary for uniform size in frame.

Next the entire directory of edited images are output in full resolution to a print directory, and once more as a version optimized for use online. If this sounds time-consuming, indeed it is – I’ve even left out a few steps to avoid boring you!

Anyway, around ten days after the conclusion of the shoot the entire batch of 850 images is uploaded so the webmaster can get busy uploading images to the site. The designer of the new season’s lookbook now has all the materials he needs to assemble the new season’s catalogue…and it is time to start scheduling the next season’s shoot!
Boris – producing Hollywood Glamour in Twenties Whitechapel

Sunday, January 4th, 2015

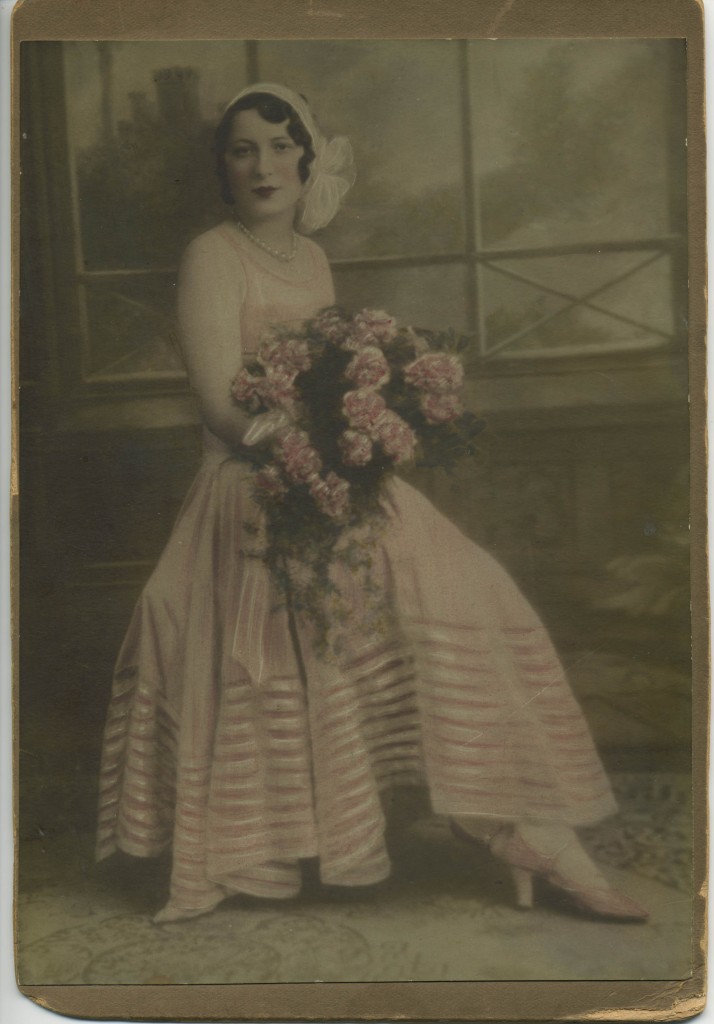
Ronnie Lawrence, a friend of mine, recently asked if I could restore a Boris photograph of his mother-in-law Ada Margolis on her wedding day.  The faded sepia image is reproduced below.

Original wedding photo of Ronnie Lawrence' mother - hand coloured, but faded!

Original wedding photo of Ronnie Lawrence’ mother – hand coloured, but faded!

In the twenties  the East End of London was a poor,  predominantly Jewish area.  This was where Boris Bennett, an immigrant from Poland, set himself up as a wedding photographer. He established his studio in Whitechapel in the twenties, and soon carved a niche for himself by his creative mastery of Hollywood lighting and set creation using art deco props.  Over his career he took over 150 thousand photographs, and many still have pride of place on mantle shelves around the country.

The restoration process

It was an interesting exercise to restore the image. I first scanned it in high resolution, then took it into Photoshop and used the white point dropper in Levels to set the white point. I tried the same for the black point using the black dropper, but the result was way to blocked out, so shifted the black point slider in Levels along to butt against the histogram where tones were just appearing. The next step was to clone out the spots and discolourations on the print. The print has obviously been painstakingly hand coloured, so I added several colour overlay layers, masking and adjusting to bring back skin tones, dress colouring and colour to the flowers.    It was important to remain faithful to the original retouching, rather than create a ‘modern’ look to the photograph.

Both the grain and time had not been kind to the face, so I smoothed the cheeks and forehead subtly, then ‘sculpted the face using a 50% grey layer in overlay mode to give definition to the facial features, using a fine brush at low opacity on the grey – white to lighten, and black to darken.

There was a hint of catchlight still visible in the eyes, so I created a blank layer and on high magnification enhanced the catchlights, to bring life to the face.

The final step was to add a curves layer, selecting Auto to bring back some ‘pop’ to the image, fading this layer until it looked natural.

The restored wedding photo - the 'hand colouring' feel still retained

The restored wedding photo

You can find more of Boris’ work, in an interesting Daily Telegraph article Wartime Wedding Glamour in the East End.   There is now also a lavishly illustrated book “Vintage Glamour in London’s East End” , by Frank Harris and Michael Greisman

I love Photoshop, but…

Tuesday, November 6th, 2012

There is no question that Photoshop is an amazing tool.  It allows one to correct flaws in images, or to create artificial realities; in short if you can imagine it, you can create it.  I use Photoshop all the time, and have done so right back from version three, which was supplied in a great pile of floppy disks!

I have no problem with fixing minor flaws when finishing images of models, either for clothing designers or for their own portfolios.

But this is a tool that should be used with integrity.  Recently my wife received a catalogue from a make-up company.  Every image in the catalogue had been retouched, not just to correct flaws, but to create a whole new reality – smooth flawless skin with not a hint of wrinkle.  The text clearly suggested that users of such make-up products could expect their skin to appear the same as in the illustrations…a claim that I consider highly misleading.  Within a day or so, another household named brand catalogue arrived with make-up products illustrated in exactly the same manner.  Then today a leaflet popped through the door for a local company offering ‘permanent make-up’ and laser treatments to beautify skin.  To my eyes the illustrations were horrendous – the skin was smoothed so much that it looked like wax – devoid of any pore structure!  Eyes were painted to remove any trace of the normal capillaries – they looked like artificial eyes!

Photoshop – reality or deceit?

A young lady friend of my wife is not a Photoshop user – and is unaware of how the image has gone from being optimized into the realms of fantasy.  These representations are images for her to strive to achieve…and strive she has.  She has invested huge sums with plastic surgeons attempting to emulate these fantasy images.  Unsurprisingly, aside from some of the awful things that have gone wrong and had to be corrected, this unfortunate lady is still nowhere near her impossible ideal…and of course she never will be.

When dealing with selling facial treatments and make-up, just what has happened to morality?


Mwa-ha-ha-ha-ha!!

Wednesday, October 31st, 2012
SINderella - is back...and looking for you...

SINderella - is back...and has her eye out for you...

Boo!

Please ‘like’ me on Facebook:

Underwater shoot…

Tuesday, October 23rd, 2012

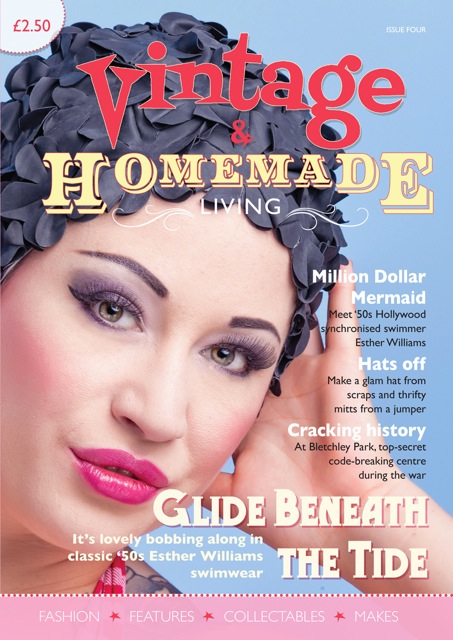
I’ve previously shared some of the covers I’ve shot for Vintage and Homemade Living.

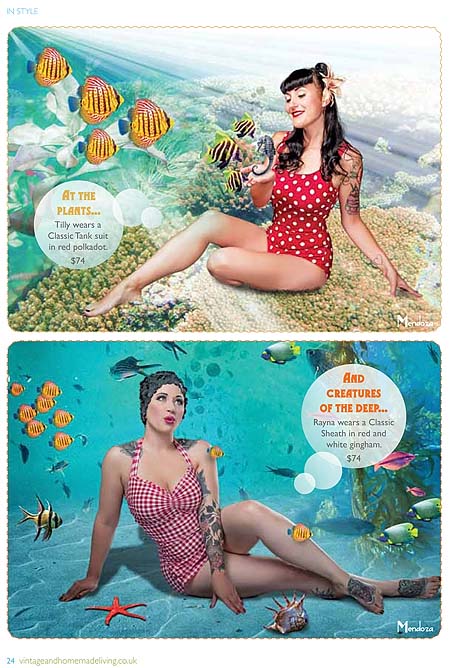
I’ve also been responsible for shooting their fashion spreads, which has been good fun. For the latest issue editor Caroline set me a challenge; the feature was to showcase some wonderful retro costumes, based on vintage designs under the Esther Williams brand label.

Researching images of Esther Williams, apart from one or two where she is draped decoratively along the side of a swimming pool, the majority naturally feature her swimming…her starring role in a number of vintage movies.  So Caroline suggested we shoot an ‘underwater’ set.  So i sealed the studio and assembled my underwater housing and donned snorkel and flippers…

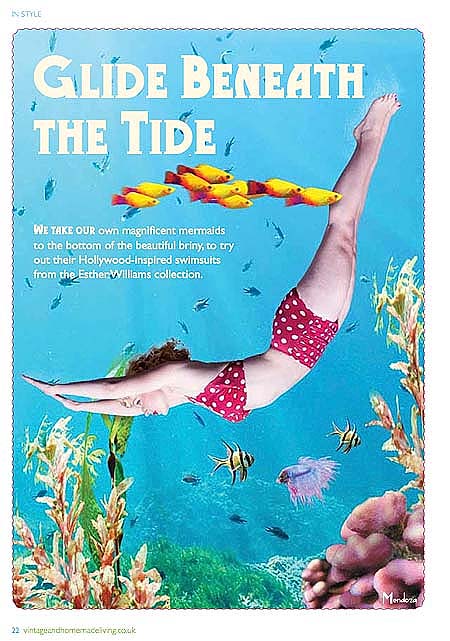
The sneak peek below, does not do justice to the end results.  All were shot in the studio and  composited later of course.  The images where the models are ‘diving’ were shot with the models standing on tiptoes – with their orientation changed later in post-production.  The feet and particularly the toes needed extra work as they were not ‘pointed’ in the right way for swimming.

If you have any interest in retro lifestyle I highly recommend you treat yourself to a copy of the magazine – which you can find at their website.

This month’s issue also has an interesting article on Ether Williams herself as well as a fascinating insight into the wartime codebreaking centre at Bletchley Park.


RVintage - Esther Wiliams

Vintage - Esther Wiliams

The above images feature Rayna Terror (cover image), Tilly Bachelor, and Rayna (with starfish)., and Frankie diving for the depths below.


Underwater shoot!

Underwater shoot!


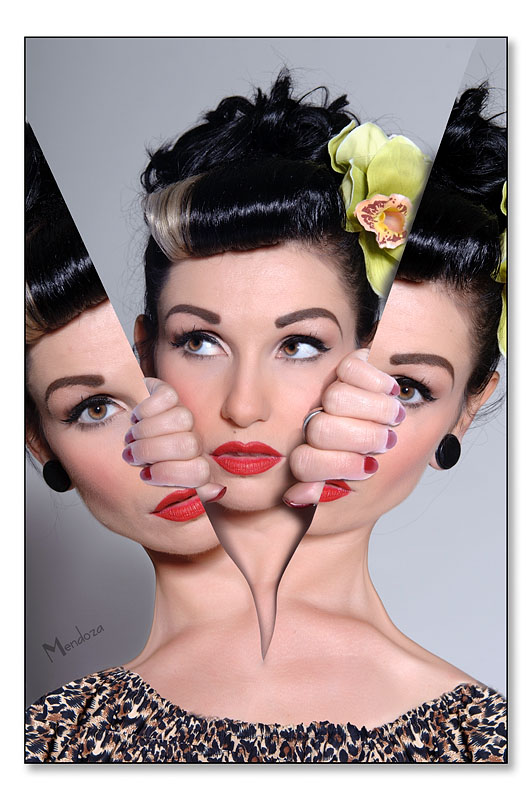
Split personality

Sunday, September 25th, 2011

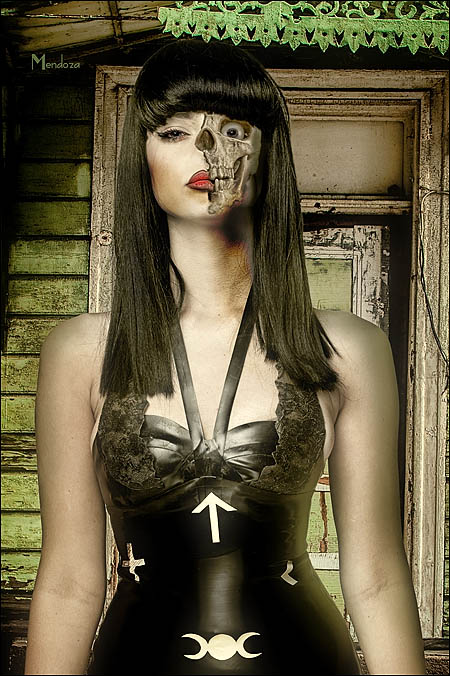
During Solene’s very busy visit to the studio I shot this planned image…it consisted of three basic images, which took no more than a couple of minutes to shoot.  However the artwork needed around 15 layers in Photoshop to complete it.   I really believe that, given time, there is nothing that cannot be created using photography and Photoshop.

I find creating projects like this extremely therapeutic!

Split personality